Authentication - Exploring Appwrite.io with React Series
by Daryl Lukas
What is Appwrite?
Appwrite is an open-source backend server for web and mobile applications. It is similar to Firebase, AWS Amplify, and Supabase in terms of features and APIs, including Authentication (User management), Database Management, Storage, and Cloud Functions. However, unlike the alternatives, Appwrite is a self-hosted solution. At the time of writing, the latest version of Appwrite is 0.8.
This is a series: Let’s build together
Full disclosure, I’m very new to this platform so I decided to do this series to share my learning experience and discuss how to compares to alternatives. If you have experience with Backend-As-A-Service platforms like Firebase, this will definitely be easier for you to pick up.
TL;DR
- Appwrite is extremely easy to install. It is packaged as a set of Docker containers that can be installed and run by executing one command.
- Because it is a self-hosted solution, you need to manage the security of your deployment, unlike managed alternatives like Firebase. To run Appwrite in production, you need to follow a few best practices, such as setting up an encryption key and limiting console access, both not enabled by default. Refer to this document for more on production.
- At the time of writing, Appwrite doesn’t have an observer method that listens for changes to the user’s authentication state, unlike Firebase’s onAuthStateChanged listener. However, the team is working on adding some real-time functionality that will address this, refer to this issue comment.
The Project: Expense Tracker
I decided to pick this idea for the project because I think it will allow us to explore most of the features Appwrite has to offer. We will be creating a simple web app in React, which allows a user to record and track financial expenses for the current month. Users will be able to create accounts, create expense logs (using pre-defined categories) and attach images of receipts to expense logs.
Installation
Create a project folder, e.g.,
mkdir Appwrite-ExpenseTrack
cd Appwrite-ExpenseTrack
Appwrite
Conveniently, Appwrite is packaged as a set of Docker containers, making it easy to run using Docker CLI, on your local machine or a cloud provider of your choice. You can find the installation instructions in the official docs. For v0.8 (the latest version of Appwrite at the time of writing), run the following docker command in the project folder.
Bash (Unix)
docker run -it --rm \
    --volume /var/run/docker.sock:/var/run/docker.sock \
    --volume "$(pwd)"/appwrite:/usr/src/code/appwrite:rw \
    --entrypoint="install" \
    appwrite/appwrite:0.8.0
CMD (Windows)
docker run -it --rm ^
    --volume //var/run/docker.sock:/var/run/docker.sock ^
    --volume "%cd%"/appwrite:/usr/src/code/appwrite:rw ^
    --entrypoint="install" ^
    appwrite/appwrite:0.8.0
PowerShell
docker run -it --rm ,
    --volume /var/run/docker.sock:/var/run/docker.sock ,
    --volume ${pwd}/appwrite:/usr/src/code/appwrite:rw ,
    --entrypoint="install" ,
    appwrite/appwrite:0.8.0
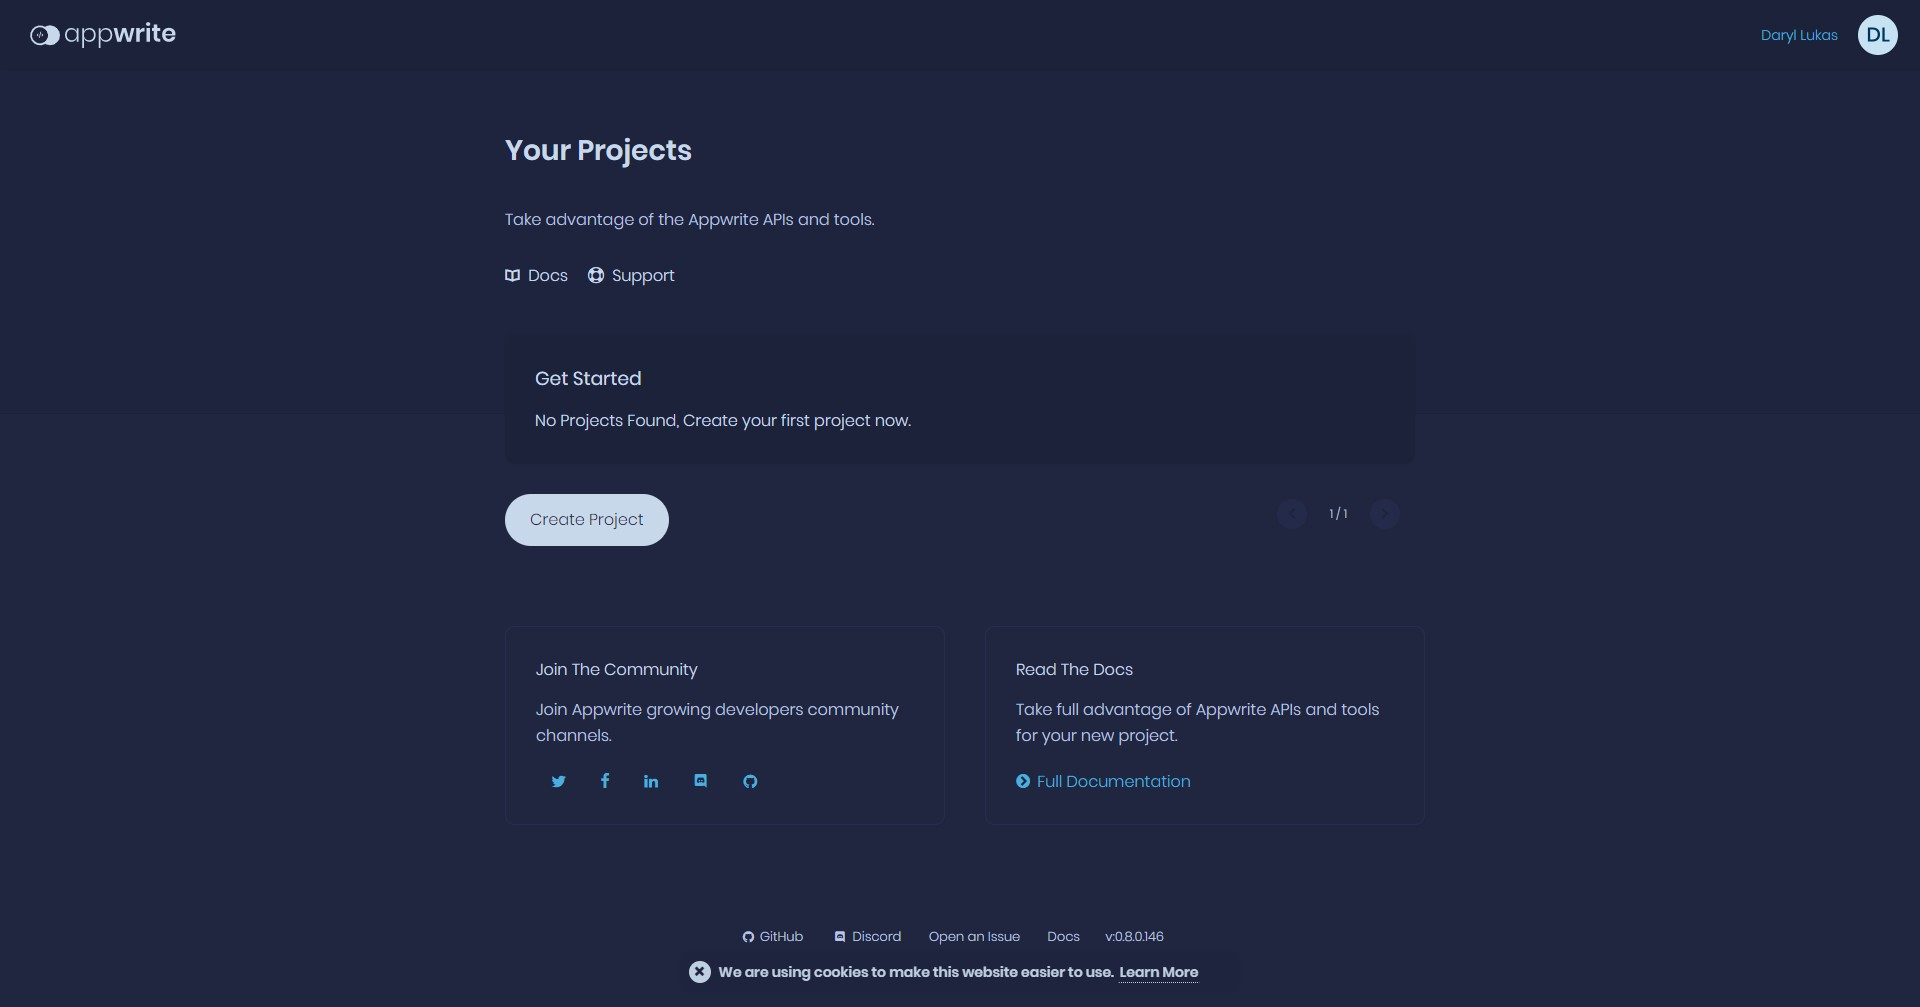
Once installed, you can access the Appwrite console on http://localhost/ (default setting). Create an account and log in. You will be prompted to create a project when you log in.
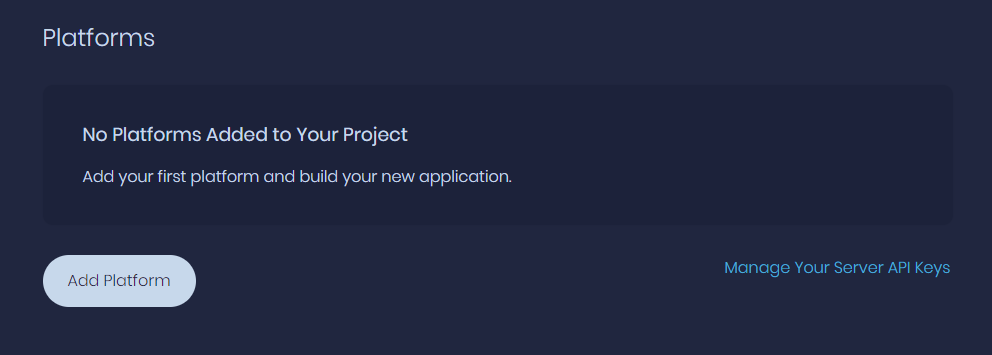
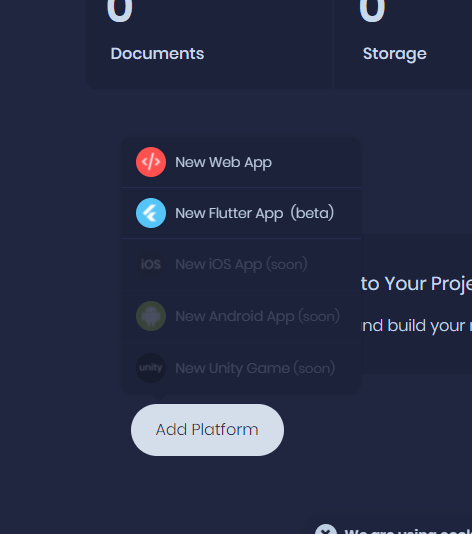
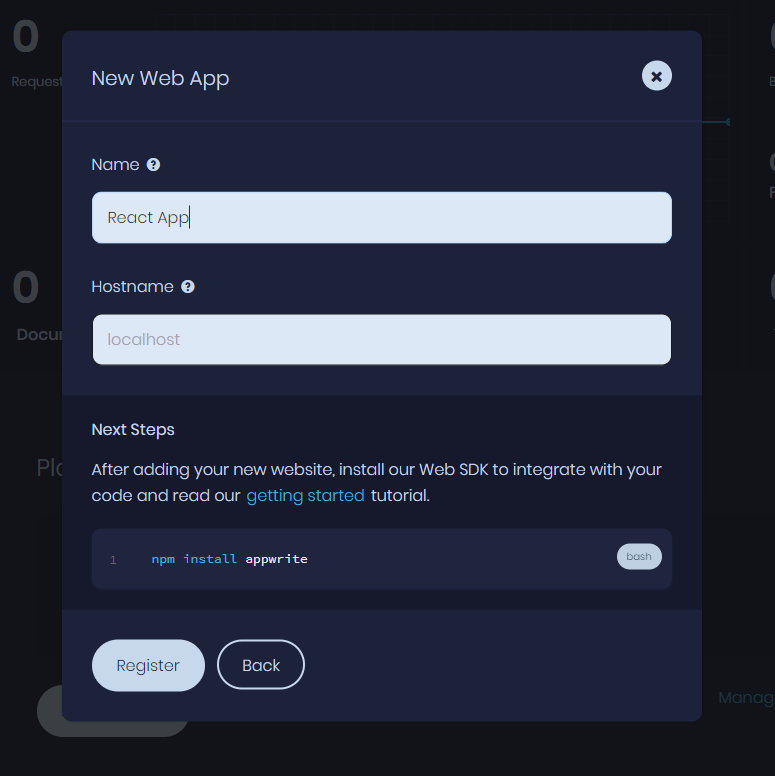
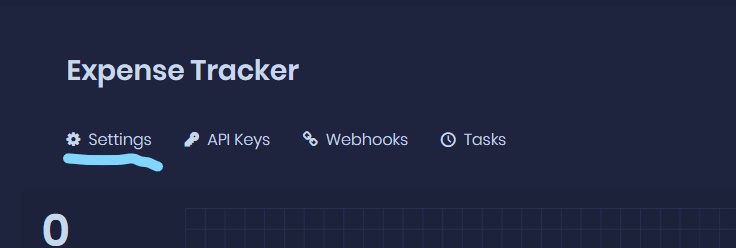
Add a Platform
On the home screen of your project, add a web platform by clicking the Add Platform button and select the Web App option.
React Project
Initialize a new React project in the root project directory.
npx create-react-app expense-tracker
cd expense-tracker
Install dependencies
Next, we are gonna install a few dependencies:
- Appwrite Web SDK.
- React Router: For routing and navigation
- Material UI: For the User Interface
yarn add appwrite react-router-dom @material-ui/core @material-ui/icons
Implementation
Configure Appwrite with React
Create a .env file in the root of your React project and paste the following:
REACT_APP_APPWRITE_PROJECT=YOUR_PROJECT_ID
REACT_APP_APPWRITE_ENDPOINT=YOUR_APPWRITE_ENDPOINT
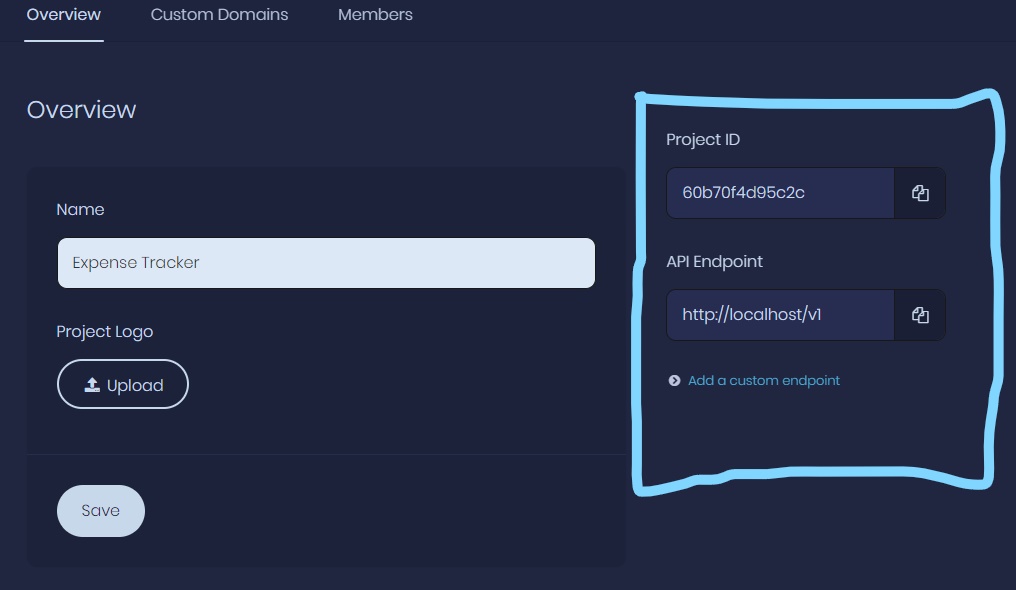
Replace YOUR_PROJECT_ID and YOUR_APPWRITE_ENDPOINT with your actual project ID and API Endpoint, respectively. These values are found on the project settings page.
Next, create a folder called services in the src folder of the React project, and in it, create a file called AppwriteService.js. Add the following class, which, at the moment, only initializes the SDK. We will be adding more methods to this class.
import { Appwrite } from 'appwrite';

const config = {
  projectId: process.env.REACT_APP_APPWRITE_PROJECT,
  endpoint: process.env.REACT_APP_APPWRITE_ENDPOINT,
};

const appwrite = new Appwrite();

class AppwriteService {
  constructor() {
    appwrite.setEndpoint(config.endpoint).setProject(config.projectId);
  }
}

export default AppwriteService;
- Check the source code for the above section
Implement Appwrite Authentication APIs
Next, we will add methods to our Appwrite service class which will allow us to communicate with Appwrite’s Auth APIs.
We’ll make the following changes in src/services/AppwriteService.js:
- Instantiate an
accountproperty responsible for handling Auth API calls - define authentication methods for registration, login, and logout. Our service class should now look as follows
...

class AppwriteService {
  constructor() {
    appwrite.setEndpoint(config.endpoint).setProject(config.projectId);

    this.account = appwrite.account; // <--- Add account property
  }

  doCreateAccount = (email, password, name) => {
      return this.account.create(email, password, name);
  }

  doLogin = (email, password) => {
      return this.account.createSession(email, password);
  }

  doLogout = () => {
      return this.account.deleteSession('current');
  }
}

export default AppwriteService;
- Read more about Appwrite’s Accounts API
- Check the source code for this section
Routing
Next, we will set up routing using React Router. We’ll start by defining all our routes in src/constants/routes.js.
export const LANDING = '/';
export const SIGN_UP = '/signup';
export const SIGN_IN = '/signin';
export const HOME = '/home';
We will create pages (components) for each of those routes. For now, we are just going to add some placeholder code. The pages we are going to create are:
src/pages/Auth/SignUp.jsxsrc/pages/Auth/SignIn.jsxsrc/pages/Home/index.jsxsrc/pages/Landing/index.jsx
Here is an example for the sign up page:
src/pages/Auth/SignUp.jsx
import React from 'react';

const SignUp = () => (
  <div>
    <h1>SignUp</h1>
  </div>
);

export default SignUp;
Excercise: Do the same as above for the remaining components, SignIn, Home and Landing
Next, we will implement a Navigation component that will help users navigate our app. We are going to do this using Material UI’s AppBar component. Create a new file src/components/Navigation.js and add the following code:
import {
  AppBar,
  Button,
  makeStyles,
  Toolbar,
  Typography,
} from '@material-ui/core';
import React from 'react';
import { useHistory } from 'react-router-dom';
import * as ROUTES from '../constants/routes';

const useStyles = makeStyles((theme) => ({
  root: {
    flexGrow: 1,
  },
  title: {
    flexGrow: 1,
  },
}));

export default function Navigation() {
  const classes = useStyles();
  const history = useHistory();

  return (
    <div className={classes.root}>
      <AppBar position="static">
        <Toolbar>
          <Typography variant="h6" className={classes.title}>
            <Link
              color="inherit"
              href="#"
              underline="none"
              onClick={(e) => {
                e.preventDefault();
                history.push(ROUTES.LANDING);
              }}
            >
              Expense Tracker
            </Link>
          </Typography>
          <Button color="inherit" onClick={() => history.push(ROUTES.HOME)}>
            Home
          </Button>
          <Button color="inherit" onClick={() => history.push(ROUTES.SIGN_UP)}>
            Sign Up
          </Button>
          <Button color="inherit" onClick={() => history.push(ROUTES.SIGN_IN)}>
            Sign In
          </Button>
        </Toolbar>
      </AppBar>
    </div>
  );
}
Next, we will rewrite our App component (src/App.js) to specify which components (pages) should show up according to the corresponding routes, using React Router. We are also going to include our Navigation component to help users navigate the app. Replace the code in App.js with the following:
import { BrowserRouter as Router, Route } from 'react-router-dom';
import Navigation from './components/Navigation';
import * as ROUTES from './constants/routes';
import Landing from './pages/Landing';
import SignUp from './pages/Auth/SignUp';
import SignIn from './pages/Auth/SignIn';
import Home from './pages/Home';
import { Container } from '@material-ui/core';

function App() {
  return (
    <Router>
      <div>
        <Navigation />

        <Container>
          <Route exact path={ROUTES.LANDING} component={Landing} />
          <Route exact path={ROUTES.SIGN_UP} component={SignUp} />
          <Route exact path={ROUTES.SIGN_IN} component={SignIn} />
          <Route exact path={ROUTES.HOME} component={Home} />
        </Container>
      </div>
    </Router>
  );
}

export default App;
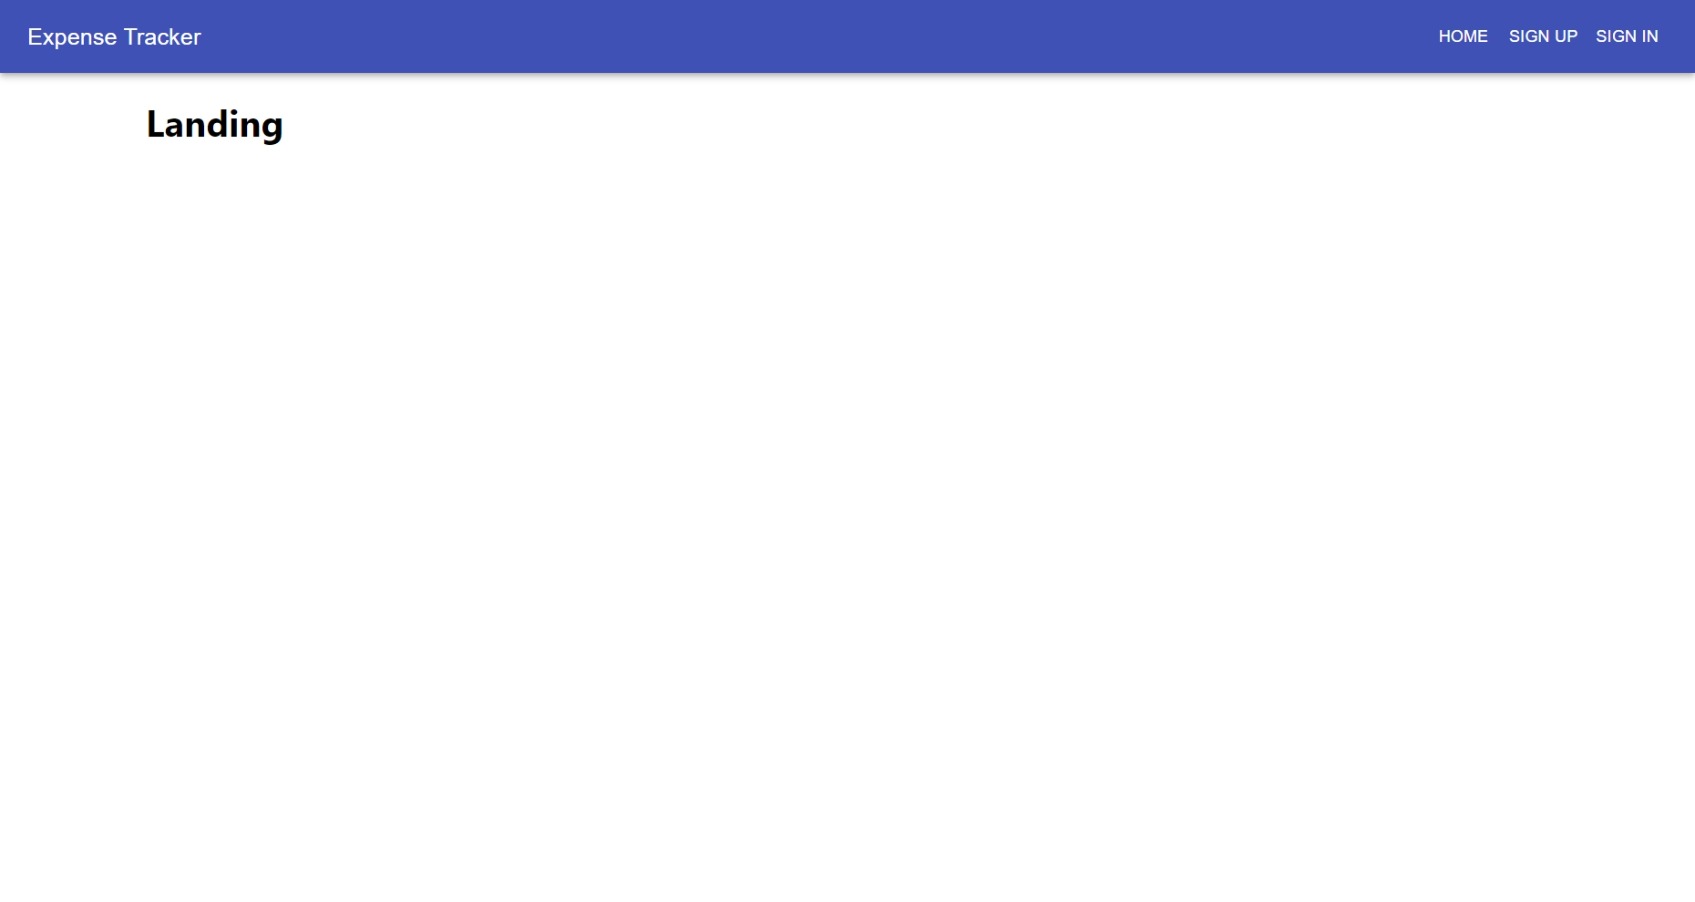
If you run the app, yarn start, you should see something like this:
- Learn more about React Router
- Check the source code for this section
Provide Appwrite in React
Next, we’ll provider the Appwrite service in React. A “simple” approach would be to create an Appwrite instance in every React component that needs to use Appwrite. However, this is a bad approach, for two reasons:
- It would be difficult to test our components
- It is more error prone. We will end up with multiple instances. Our Appwrite service class should only be initialized once (Singleton pattern.
A better approach would be to use React’s Context API to provide an Appwrite instance once at the top level of our component hierarchy. Create a new file src/context/Appwrite/index.js in your React project and add the following:
import React from 'react';

const AppwriteContext = React.createContext(null);

export default AppwriteContext;
We will then create a well-encapsulated Appwrite module by defining a new file src/components/Appwrite/index.js which exports the AppwriteService class and AppwriteContext.
import AppwriteContext from '../../context/Appwrite';
import Appwrite from '../../services/AppwriteService';

export default Appwrite;

export { AppwriteContext };
The React.createContext() method in src/context/Appwrite/index.js creates two components, AppwriteContext.Provider which is used to provide an Appwrite instance once at the top of our component tree and AppwriteContext.Consumer for every component which requires access to Appwrite.
We will use the AppwriteContext.Provider component to provide an Appwrite instance to the entire application by wrapping it around our root component in /src/index.js, like this:
import React from 'react';
import ReactDOM from 'react-dom';
import './index.css';
import App from './App';
import reportWebVitals from './reportWebVitals';
import Appwrite, {AppwriteContext} from './components/Appwrite';

ReactDOM.render(
  <React.StrictMode>
    <AppwriteContext.Provider value={new Appwrite()}>
    <App />
    </AppwriteContext.Provider>
  </React.StrictMode>,
  document.getElementById('root')
);

reportWebVitals();
Here, Appwrite is instantiated once and injected into our component tree via React Context API. Now every component which requires access to Appwrite can do so by using the AppwriteContext.Consumer component. An example of such a component would look like this:
import React from 'react';

import {AppwriteContext} from './components/Appwrite';

const SomeExampleComponent = () => (
  <AppwriteContext.Consumer>
    {appwrite => {
      return <div>This component has access to Appwrite.</div>;
    }}
  </AppwriteContext.Consumer>
);

export default SomeExampleComponent;
However, we can make this easier and reduce the number of lines of code we write by making use of React Hooks, specifically the useContext() function. The example above can be rewritten as follows:
import React, {useContext} from 'react';

import {AppwriteContext} from './components/Appwrite';

const SomeExampleComponent = () => {
    const appwrite = useContext(AppwriteContext);
    return (
            <div>This component has access to Appwrite.</div>
        );
}

export default SomeExampleComponent;
- Learn more about React’s Context API and useContext Hook
- Check the source code for this section
User Sign Up / Registration
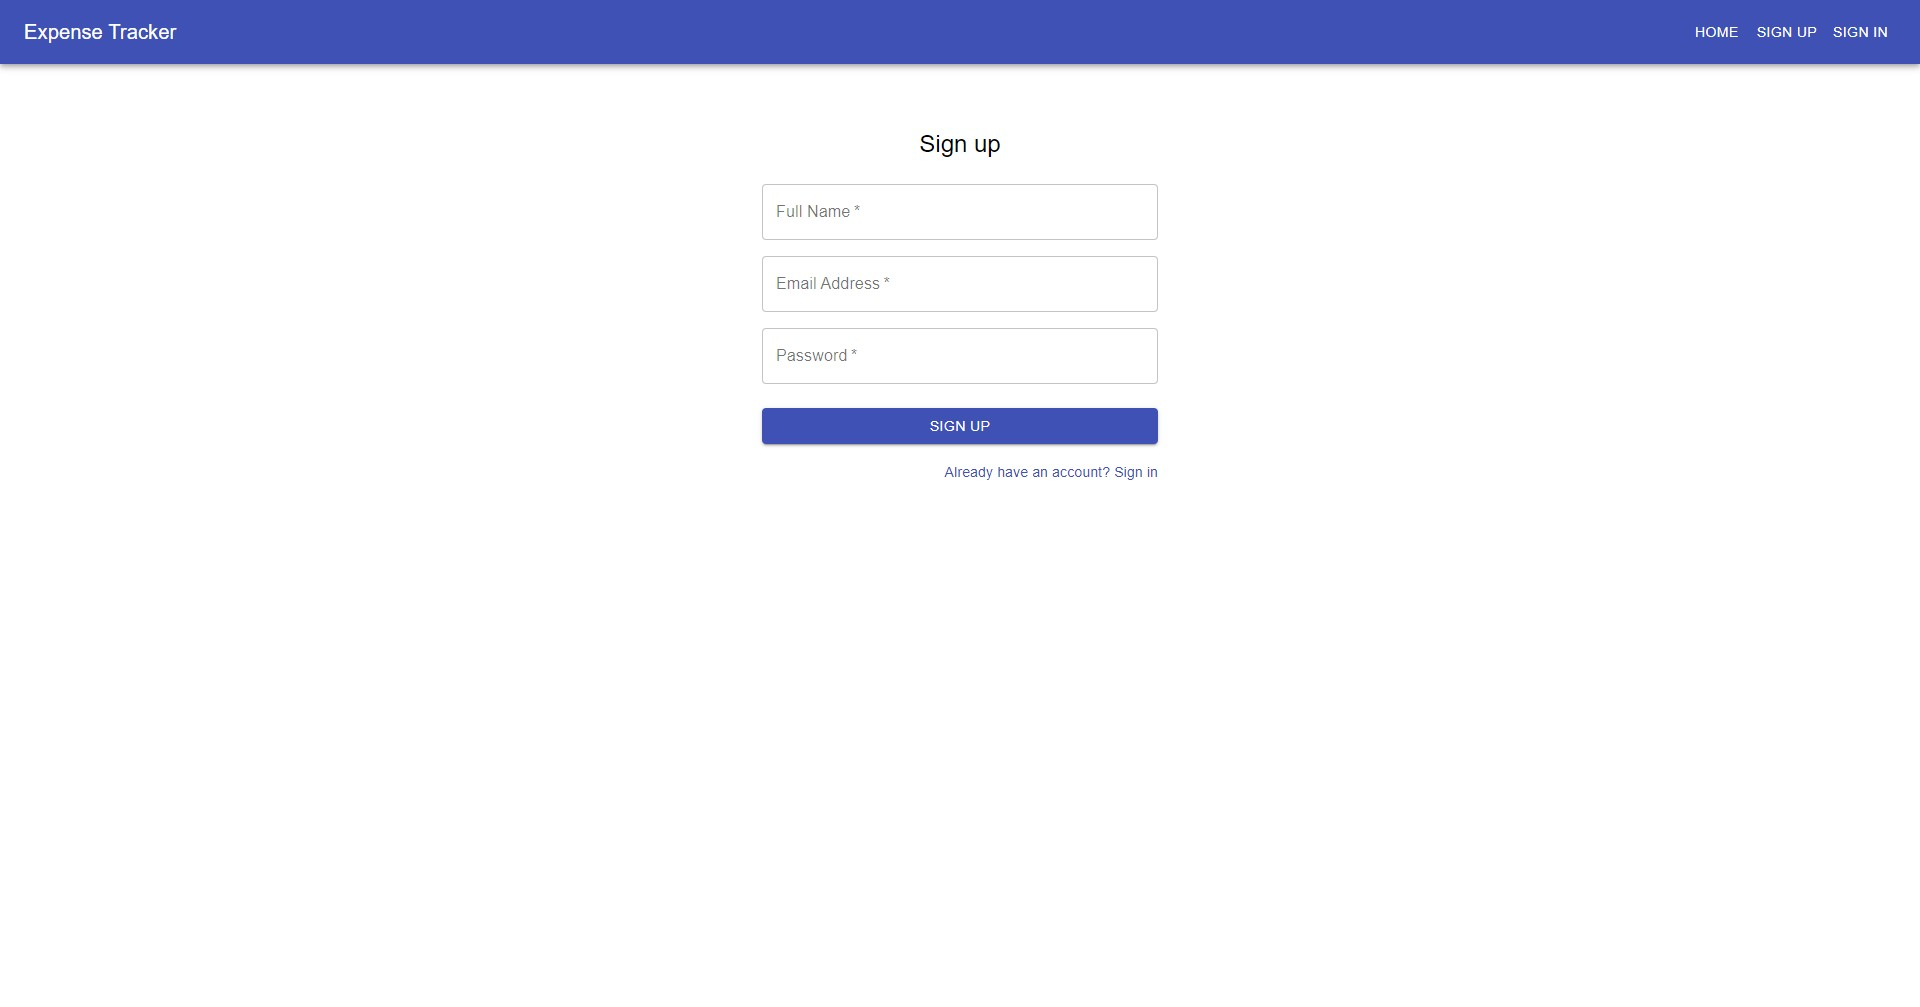
Next, we will design our sign-up form. Replace the contents of src/pages/Auth/SignUp.js with the following. Note: This design is based on Material UI templates (with a few modifications), specifically the Sign-Up template (check out the demo and source code)
import React from 'react';
import Button from '@material-ui/core/Button';
import TextField from '@material-ui/core/TextField';
import Link from '@material-ui/core/Link';
import Grid from '@material-ui/core/Grid';
import Typography from '@material-ui/core/Typography';
import { makeStyles } from '@material-ui/core/styles';
import Container from '@material-ui/core/Container';

const useStyles = makeStyles((theme) => ({
  paper: {
    marginTop: theme.spacing(8),
    display: 'flex',
    flexDirection: 'column',
    alignItems: 'center',
  },
  form: {
    width: '100%', // Fix IE 11 issue.
    marginTop: theme.spacing(3),
  },
  submit: {
    margin: theme.spacing(3, 0, 2),
  },
}));

export default function SignUp() {
  const classes = useStyles();

  return (
    <Container component="main" maxWidth="xs">
      <div className={classes.paper}>
        <Typography component="h1" variant="h5">
          Sign up
        </Typography>
        <form className={classes.form} noValidate>
          <Grid container spacing={2}>
            <Grid item xs={12}>
              <TextField
                autoComplete="name"
                name="name"
                variant="outlined"
                required
                fullWidth
                id="name"
                label="Full Name"
                autoFocus
              />
            </Grid>
            <Grid item xs={12}>
              <TextField
                variant="outlined"
                required
                fullWidth
                id="email"
                label="Email Address"
                name="email"
                autoComplete="email"
              />
            </Grid>
            <Grid item xs={12}>
              <TextField
                variant="outlined"
                required
                fullWidth
                name="password"
                label="Password"
                type="password"
                id="password"
                autoComplete="current-password"
              />
            </Grid>
          </Grid>
          <Button
            type="submit"
            fullWidth
            variant="contained"
            color="primary"
            className={classes.submit}
          >
            Sign Up
          </Button>
          <Grid container justify="flex-end">
            <Grid item>
              <Link href="#" variant="body2">
                Already have an account? Sign in
              </Link>
            </Grid>
          </Grid>
        </form>
      </div>
    </Container>
  );
}
Now that we have our component/form layout, we will play around with the component’s state to manage the actual form’s state. We will create state variables for our form fields.
import React, { useState } from 'react';
...
export default function SignUp() {
  const classes = useStyles();

  const [name, setName] = useState('');
  const [email, setEmail] = useState('');
  const [password, setPassword] = useState('');
...
Next, we will bind the state variables to the form fields and implement onChange event listeners to update their values. Below is a snippet of how the TextField for the name form field should look. Do the same for the email and password fields. You can refer to this commit for what the final edit should look like.
...
<TextField
    autoComplete="name"
    name="name"
    value={name} // <--- bind to set variable
    onChange={(e) => setName(e.target.value)} // <--- implement event handler
    variant="outlined"
    required
    fullWidth
    id="name"
    label="Full Name"
    autoFocus
/>
...
Next, we’ll bind the entire form to an onSubmit event listener which will call the doCreateAccount function of the Appwrite service. We are also going to make sure the form doesn’t submit empty data by adding some simple validation code. We first need to import the Appwrite context and “consume” it using the useContext hook. Doing this will give our component access to the AppwriteService class.
import React, { useContext, useState } from 'react'; // Import useContext hook
import { AppwriteContext } from "../../components/Appwrite"; // Import Appwrite context
...
export default function SignUp() {
  const classes = useStyles();

  const [name, setName] = useState('');
  const [email, setEmail] = useState('');
  const [password, setPassword] = useState('');

    // Get Appwrite instance
    const appwrite = useContext(AppwriteContext);

    // Create event listener
  const onSubmit = (e) => {
    e.preventDefault();
    if (name === '' || email === '' || password === '') {
      alert('All fields are required');
      return;
    }

    appwrite.doCreateAccount(email, password, name).then((result) => {
      console.log('Success', result);
    }).catch((error) => {
      console.log('Error', error);
    });
  }
...
// Bind event listener
<form className={classes.form} noValidate onSubmit={onSubmit}>
...
The code above will simply log a user object from Appwrite, if registration is successful. Also notice how we are using the useContext to access our Appwrite instance (as described in the previous section, titled Provide Appwrite in React).
Run the application to make sure it’s working as expected.
- Check the source code for this section
User Sign In
For our sign-in form, located at src/pages/Auth/SignIn.js, we’ll use the following design:
import React from 'react';
import Button from '@material-ui/core/Button';
import TextField from '@material-ui/core/TextField';
import Link from '@material-ui/core/Link';
import Grid from '@material-ui/core/Grid';
import Typography from '@material-ui/core/Typography';
import { makeStyles } from '@material-ui/core/styles';
import Container from '@material-ui/core/Container';

const useStyles = makeStyles((theme) => ({
  paper: {
    marginTop: theme.spacing(8),
    display: 'flex',
    flexDirection: 'column',
    alignItems: 'center',
  },
  avatar: {
    margin: theme.spacing(1),
    backgroundColor: theme.palette.secondary.main,
  },
  form: {
    width: '100%', // Fix IE 11 issue.
    marginTop: theme.spacing(1),
  },
  submit: {
    margin: theme.spacing(3, 0, 2),
  },
}));

export default function SignIn() {
  const classes = useStyles();

  return (
    <Container component="main" maxWidth="xs">
      <div className={classes.paper}>
        <Typography component="h1" variant="h5">
          Sign in
        </Typography>
        <form className={classes.form} noValidate>
          <TextField
            variant="outlined"
            margin="normal"
            required
            fullWidth
            id="email"
            label="Email Address"
            name="email"
            autoComplete="email"
            autoFocus
          />
          <TextField
            variant="outlined"
            margin="normal"
            required
            fullWidth
            name="password"
            label="Password"
            type="password"
            id="password"
            autoComplete="current-password"
          />
          <Button
            type="submit"
            fullWidth
            variant="contained"
            color="primary"
            className={classes.submit}
          >
            Sign In
          </Button>
          <Grid container>
            <Grid item xs>
              <Link href="#" variant="body2">
                Forgot password?
              </Link>
            </Grid>
            <Grid item>
              <Link href="#" variant="body2">
                {"Don't have an account? Sign Up"}
              </Link>
            </Grid>
          </Grid>
        </form>
      </div>
    </Container>
  );
}

Just like we did with the sign-up form, we are going to create some state variables to manage the form’s state
import React, { useState } from 'react';
...
export default function SignIn() {
  const classes = useStyles();

  const [email, setEmail] = useState('');
  const [password, setPassword] = useState('');
...
Then bind these state variables to the form fields and implement onChange event listeners to update their values. Here is a snippet of the email TextField. Remember to make the same changes to the password field. Refer to this commit.
...
<TextField
    variant="outlined"
    margin="normal"
    required
    fullWidth
    id="email"
    label="Email Address"
    name="email"
    value={email} // <-- bind to variable
    onChange={(e) => setEmail(e.target.value)} // <-- event handler
    autoComplete="email"
    autoFocus
/>
Next, we will make a call to Appwrite to authenticate the user using an onSubmit event handle, as we did with the sign-up form.
import React, { useContext, useState } from 'react'; // Import useContext hook
import { AppwriteContext } from "../../components/Appwrite"; // Import Appwrite context

...

export default function SignIn() {
  const classes = useStyles();

  const [email, setEmail] = useState('');
  const [password, setPassword] = useState('');

    // Get Appwrite instance
  const appwrite = useContext(AppwriteContext);

    // Create event listener
  const onSubmit = (e) => {
    e.preventDefault();
    if ( email === '' || password === '') {
      alert('All fields are required');
      return;
    }

    appwrite.doLogin(email, password).then((result) => {
      console.log('Success', result);
    }).catch((error) => {
      console.log('Error', error);
    });
  }

    ...
    // Bind event listener
    <form className={classes.form} noValidate onSubmit={onSubmit}>
    ...
The code above will output a user object from Appwrite in the browser console if authentication is successful. Run the application to make sure it’s working as expected.
- Check the source code for this section
Session Handling
Next, we are going to implement session handling to keep track of the authenticated user, using a higher-order component and Context API. If a user is authenticated, we’ll store that session in state and share it with interested components using Context API, as we did with the Appwrite service instance.
We’ll start by creating a new context for the authentication session, src/context/Session/index.js
import React from 'react';

const AuthUserContext = React.createContext({});

export default AuthUserContext
Next, we will add a method to our Appwrite service class, which will get the currently authenticated user. Add the following method to src/services/AppwriteService.js
...
  doGetCurrentUser = () => {
    return this.account.get();
  }
...
Then, we’ll create a higher-order component, src/components/Session/withAuthentication.jsx, which will contain all the functionality which deals with the authenticated user. We will use AuthUserContext.Provider to pass the following to consuming components: authUser (the current user object) and getCurrentUser() (a method which will be used to get an updated user object).
import React, { useCallback, useContext, useEffect, useState } from 'react';
import AuthUserContext from '../../context/Session';
import { AppwriteContext } from '../../components/Appwrite';

const withAuthentication = (Component) =>
  function WithAuthentication(props) {
    const [authUser, setAuthUser] = useState(null);
    const appwrite = useContext(AppwriteContext);

    const getCurrentUser = useCallback(() => {
      appwrite
        .doGetCurrentUser()
        .then((user) => {
          setAuthUser(user);
        })
        .catch(() => {
          setAuthUser(null);
        });
    }, [appwrite])

    useEffect(() => {
      getCurrentUser();
    }, [getCurrentUser]);

    return (
      <AuthUserContext.Provider value={{ authUser, getCurrentUser }}>
        <Component {...props} />
      </AuthUserContext.Provider>
    );
  };

export default withAuthentication;
Then export the higher-order component in src/components/Session/index.js
import withAuthentication from "./withAuthentication";

export {withAuthentication}
Next, we will wrap the higher-order component around our App component so the child components like the Navigation component can access all the logic that deals with the authenticated user. Make the following change in src/App/js
import { withAuthentication } from './components/Session';
...
export default withAuthentication(App);
Next, we will make changes to the Navigation component. We are going to conditionally render navigation links based on the session state. For instance, if the user is not authenticated, we will display SignUp and SignIn links but if the user is authenticated, these links will be hidden and we will instead display a logout button and perhaps links to other private routes (routes that require authentication). Make the following changes in src/Components/Navigation.js
...
import {
  AppBar,
  Box,
  Button,
  Link,
  makeStyles,
  Toolbar,
  Typography,
} from '@material-ui/core';
import React, { useContext } from 'react';
import AuthUserContext from '../context/Session';
...
export default function Navigation() {
  ...
  const {authUser} = useContext(AuthUserContext);

    return(
    ...
          <Typography variant="h6" className={classes.title}>
            <Link
              color="inherit"
              href="#"
              underline="none"
              onClick={(e) => {
                e.preventDefault();
                history.push(ROUTES.LANDING);
              }}
            >
              Expense Tracker
            </Link>
          </Typography>
          {authUser ? (
            <>
              {authUser.name && (
                <Box mr={3}>
                  <Typography variant="h6" color="inherit">
                    Hello, {authUser.name}
                  </Typography>
                </Box>
              )}
              <Button color="inherit" onClick={() => history.push(ROUTES.HOME)}>
                Home
              </Button>
              <Button color="inherit">Sign Out</Button>
            </>
          ) : (
            <>
              <Button
                color="inherit"
                onClick={() => history.push(ROUTES.SIGN_UP)}
              >
                Sign Up
              </Button>
              <Button
                color="inherit"
                onClick={() => history.push(ROUTES.SIGN_IN)}
              >
                Sign In
              </Button>
            </>
          )}
    ...
    );
Now when the user is authenticated, they will see the following on the Navigation component

… and this when they are NOT authenticated

- Learn more about Higher-Order Components
Sign Out
Next, we are going to add sign out functionality by simply making the following changes in src/components/Navigation.jsx
...
import { AppwriteContext } from './Appwrite';
...

export default function Navigation() {
    ...
    const {authUser, getCurrentUser} = useContext(AuthUserContext);
  const appwrite = useContext(AppwriteContext);

  const handleLogout = () => {
    appwrite
      .doLogout()
      .then(() => {
        getCurrentUser();
        history.push(ROUTES.LANDING);
      })
      .catch((err) => console.log(err));
  };


  return (
                        ...
              <Button color="inherit" onClick={handleLogout}>
                Sign Out
              </Button>
                        ...
  );
- Check the source code for this section
Private/Protected Routes
We are now going to implement private routes, i.e., routes/pages that can only be accessed by an authenticated user. If the user is not authenticated, we will redirect them to the login page.
We’ll start by creating a PrivateRoute component which will be used as a wrapper for routes that require authentication. The wrapper will render a passed component on the condition that the authUser is present, otherwise, it will redirect to the login route.
Create a new file, src/components/PrivateRoute/index.jsx, and add the following code
import React, { useEffect, useContext } from 'react';
import AuthUserContext from '../../context/Session';
import { Route, Redirect } from "react-router-dom";
import * as ROUTES from '../../constants/routes';

const PrivateRoute = ({ component: Component, ...rest }) => {

    const { authUser } = useContext(AuthUserContext);

    return (
        <Route {...rest}
            render={props => authUser ?
                (<Component {...props} />) :
                (<Redirect to={{ pathname: ROUTES.SIGN_IN, state: { from: props.location } }} />)}
        />
    )
}

export default PrivateRoute;
Notice the state prop in the Redirect component. This will be used to redirect the user back to the page they were trying to access before they were authenticated.
Next, we will turn one of our routes into a private route, specifically the Home route. To do that, we simply import PrivateRoute in our App component and change the home route from Route to PrivateRoute.
...
import PrivateRoute from './components/PrivateRoute';

function App() {
  return (
    <Router>
            ...
            <PrivateRoute exact path={ROUTES.HOME} component={Home} />
            ...
        </Router>
    );
}
We are also going to add some logic to redirect the user if they are already logged in and after they log in. In src/pages/Auth/SignIn.js, make the following changes:
import React, { useState, useContext, useEffect } from 'react';
...
import * as ROUTES from '../../constants/routes';
import { useHistory } from 'react-router-dom';
import AuthUserContext from '../../context/Session';
...
export default function SignIn() {
    ...
  const {authUser, getCurrentUser} = useContext(AuthUserContext);

  const history = useHistory();

  useEffect(() => {
    if(authUser) {
      history.replace(ROUTES.HOME)
    }
  }, [authUser]);


    const onSubmit = (e) => {
    e.preventDefault();
    if ( email === '' || password === '') {
      alert('All fields are required');
      return;
    }

        appwrite.doLogin(email, password).then(() => {
      getCurrentUser();
      const locationState = history.location.state;
      let redirectTo = ROUTES.HOME;
      if (locationState && locationState.from.pathname) {
                redirectTo = locationState.from.pathname;
      }
      history.replace(redirectTo);
    }).catch((error) => {
      console.log('Error', error);
    });
  }
We are also going to redirect users to the login page after they sign up. Make the following changes in src/pages/Auth/SignUp.jsx
...
import * as ROUTES from '../../constants/routes';
import { useHistory } from 'react-router-dom';

...

export default function SignUp() {
  ...

  const history = useHistory();

  const onSubmit = (e) => {
    e.preventDefault();
    if (name === '' || email === '' || password === '') {
      alert('All fields are required');
      return;
    }

    appwrite
      .doCreateAccount(email, password, name)
      .then(() => {
        history.replace(ROUTES.SIGN_IN);
      })
      .catch((error) => {
        console.log('Error', error);
      });
  };
    ...
- Check the source code for this section
Summary
That’s it for now. Let’s recap what we’ve done so far.
- We easily installed Appwrite (using Docker) and set up a React project.
- We provided an Appwrite service class in React using the Context API
- We also used the Context API and a Higher-Order Component to keep track of the current user session.
I’m interested to see what you can build on top of this code, or if you have a different implementation of authentication using Appwrite. Also, If you are up for it, here are some simple exercises you can do:
- Provide the user some feedback if something has gone wrong during sign-in or sign-up. A simple error message, e.g., “Invalid credentials”
- Add change/update password functionality functionality
Please feel free to share your implementations. You can find me on Twitter and LinkedIn
Let’s connect in the next part of this series where we’ll look at the Appwrite Database.